The checkout is where customers make purchases. For SaaS businesses, it's the process where customers enter their details and payment information, and confirm that they'd like to sign up for a subscription with you.
You can use Paddle.js to integrate an inline checkout into your app. Inline checkout lets you embed a checkout and display information about items and totals in your own interface, creating checkout experiences that are fully integrated with your app.
Explore the code for this tutorial and test right away using our inline checkout pen.
What are we building?
In this tutorial, we'll build a page that embeds a multi-page inline checkout for three items in our product catalog. We'll display information about items and totals in a table on the page, add a way for customers to switch to annual plan during checkout, then we'll extend it by passing customer information.

We'll learn how to:
- Include and set up Paddle.js using a client-side token
- Pass settings to Paddle.js to embed an inline checkout in our page
- Pass items to inline checkout using
Paddle.Checkout.open() - Display and update information about items and totals using checkout events
- Take a test payment
- Update items for an opened checkout using
Paddle.Checkout.updateCheckout()
If you like, you can view on CodePen and follow along.
Before you begin
Choose a checkout implementation
This tutorial walks through creating an inline checkout. You can also create overlay checkouts, which let you launch a checkout in just a few lines of code.
We recommend building an overlay checkout if you're new to Paddle. Inline checkouts use the same JavaScript methods as overlay checkouts, so you can switch to an inline checkout later.
Overlay checkout

Integrate Paddle in just a few lines of code. Launches an overlay to capture payment.
Quick to set up: add Paddle.js to your site and call Paddle.Checkout.open() or use data-* HTML attributes to launch the checkout.
Checkout opens as a modal overlay on top of your page, focusing the user on payment.
Customize colors, logo, and branding in the Paddle dashboard. Structure and experience is managed by Paddle.
Inline checkout

Get complete control of the checkout experience. Captures payment directly in your app.
Embed Paddle Checkout directly into your page layout. Use a container element and set displayMode to inline.
Checkout form is part of your page flow—lets you create fully integrated or branded payment experiences.
Full control over surrounding layout and styling; you can design the context and surrounding UX.
To learn more about the differences between overlay and inline checkouts, see Paddle Checkout
Create products and prices
Paddle Checkout works with products and prices to say what a customer is purchasing, so you'll need to create a product and at least one related price to pass to your checkout.
Set your default payment link
You'll also need to:
- Set your default payment link under Paddle > Checkout > Checkout settings > Default payment link.
- Get your default payment link domain approved, if you're working with the live environment.
Overview
Add an inline checkout to your website or app in five steps:
- Include and initialize Paddle.js
Add Paddle.js to your app or website, so you can securely capture payment information and build subscription billing experiences. - Embed and pass checkout settings and items
Pass settings to determine how your checkout opens and how it works, then pass items to say what your checkout is for. - Show and update on-page information
Inline checkout handles capturing payment securely. Display an items list and totals on your page, and update using event callbacks. - Take a test payment
Make sure that your checkout loads successfully, then take a test payment. - Update your checkout Optional
Dynamically update items and other information for your opened checkout.
Include and initialize Paddle.js
Paddle.js is a lightweight JavaScript library that lets you build rich, integrated subscription billing experiences using Paddle. We can use Paddle.js to securely work with products and prices in our Paddle system, as well as opening checkouts and capturing payment information.
Include Paddle.js script
Start with a blank webpage, or an existing page on your website. Then, include Paddle.js by adding this script to the <head>:
<script src="https://cdn.paddle.com/paddle/v2/paddle.js"></script>Set environment Optional
We recommend signing up for a sandbox account to test and build your integration, then switching to a live account later when you're ready to go live.
If you're testing with the sandbox, call Paddle.Environment.set() and set your environment to sandbox:
<script src="https://cdn.paddle.com/paddle/v2/paddle.js"></script><script type="text/javascript"> Paddle.Environment.set("sandbox");</script>Pass a client-side token
Next, go to Paddle > Developer tools > Authentication and create a client-side token. Client-side tokens let you interact with the Paddle platform in frontend code, like webpages or mobile apps. They have limited access to the data in your system, so they're safe to publish.
In your page, call Paddle.Initialize() and pass your client-side token as token. For best performance, do this just after calling Paddle.Environment.set(), like this:
<script src="https://cdn.paddle.com/paddle/v2/paddle.js"></script><script type="text/javascript"> Paddle.Environment.set("sandbox"); Paddle.Initialize({ token: "test_7d279f61a3499fed520f7cd8c08" // replace with a client-side token });</script>Embed and pass checkout settings
Next, we'll set an element on our page as a container for Paddle Checkout and set up Paddle.js for inline checkout.
Inline checkout works by embedding a frame that contains Paddle Checkout into your website or app. The Paddle Checkout frame handles securely capturing payment information, letting you display information about items and totals elsewhere on the page.
Create checkout container
Create an empty <div> for the Paddle Checkout frame and give it a unique class, for example checkout-container:
<div class="checkout-container"></div>Pass settings
Now, we'll pass the class of this empty <div> to tell Paddle.js where to embed the checkout frame. We'll also pass checkout settings to tell Paddle.js to load an inline checkout and say how our inline checkout should work.
Update your Paddle.Initialize() method call so that it includes checkout.settings. These settings are applied to all checkouts opened on this page.
In our sample, we pass these settings to checkout.settings:
| Parameter | Description | |
|---|---|---|
displayMode | Determines whether Paddle.js should open an inline or overlay checkout. | We set to inline. |
frameTarget | Sets the element where Paddle Checkout should be loaded. | We passed our checkout-container class name. |
frameInitialHeight | Sets the initial height of the dev element where Paddle Checkout is loaded. | We set this to 450, which is our recommendation. |
frameStyle | CSS properties to apply to the checkout container. | We passed some simple CSS styles here. |
<script type="text/javascript"> Paddle.Environment.set("sandbox"); Paddle.Initialize({ token: "test_7d279f61a3499fed520f7cd8c08", // replace with a client-side token checkout: { settings: { displayMode: "inline", frameTarget: "checkout-container", frameInitialHeight: "450", frameStyle: "width: 100%; min-width: 312px; background-color: transparent; border: none;" } } });</script>We've covered the required settings for an inline checkout, but you can also pass locale, theme, and other settings that control how Paddle Checkout works. For more information, see Pass checkout settings
Pass items
Checkouts must be for one or more items. If we were to try to open a checkout so far, Paddle.js would throw an error.
To pass items, we can use the Paddle.Checkout.open() method.
In our sample, we've created a function called openCheckout() to open a checkout. Here's how it works:
- We create a variable called
monthItemsListand pass an array of objects, where each object contains apriceIdandquantity. In our case, there are two prices that recur monthly and a single one-time price. - We create a function called
openCheckout()that takes a parameter calleditems. - In our
openCheckout()function, we callPaddle.Checkout.open(), passing the value ofitemsas the items list for the checkout.
Recurring items on a checkout must have the same billing interval. For example, you can't have a checkout with some prices that are billed monthly and some products that are billed annually.
<script type="text/javascript">  Paddle.Environment.set("sandbox");  Paddle.Initialize({    token: "test_7d279f61a3499fed520f7cd8c08", // replace with a client-side token    checkout: {      settings: {        displayMode: "inline",        frameTarget: "checkout-container",        frameInitialHeight: "450",        frameStyle: "width: 100%; min-width: 312px; background-color: transparent; border: none;"      }    }  });
  // define items  let monthItemsList = [    {      priceId: 'pri_01gsz8x8sawmvhz1pv30nge1ke',      quantity: 10    },    {      priceId: 'pri_01gsz95g2zrkagg294kpstx54r',      quantity: 1    },    {      priceId: 'pri_01gsz98e27ak2tyhexptwc58yk',      quantity: 1    }  ];
// open checkout function openCheckout(items){ Paddle.Checkout.open({ items: items }); }</script>Set openCheckout() to run on page load
Right now, we've written a function to open a checkout, but we haven't set it to run.
We can add onLoad to our <body> tag to run our openCheckout() function immediately after the page has loaded, passing in our monthItemsList variable as a parameter:
<body onLoad="openCheckout(monthItemsList)">Test your work
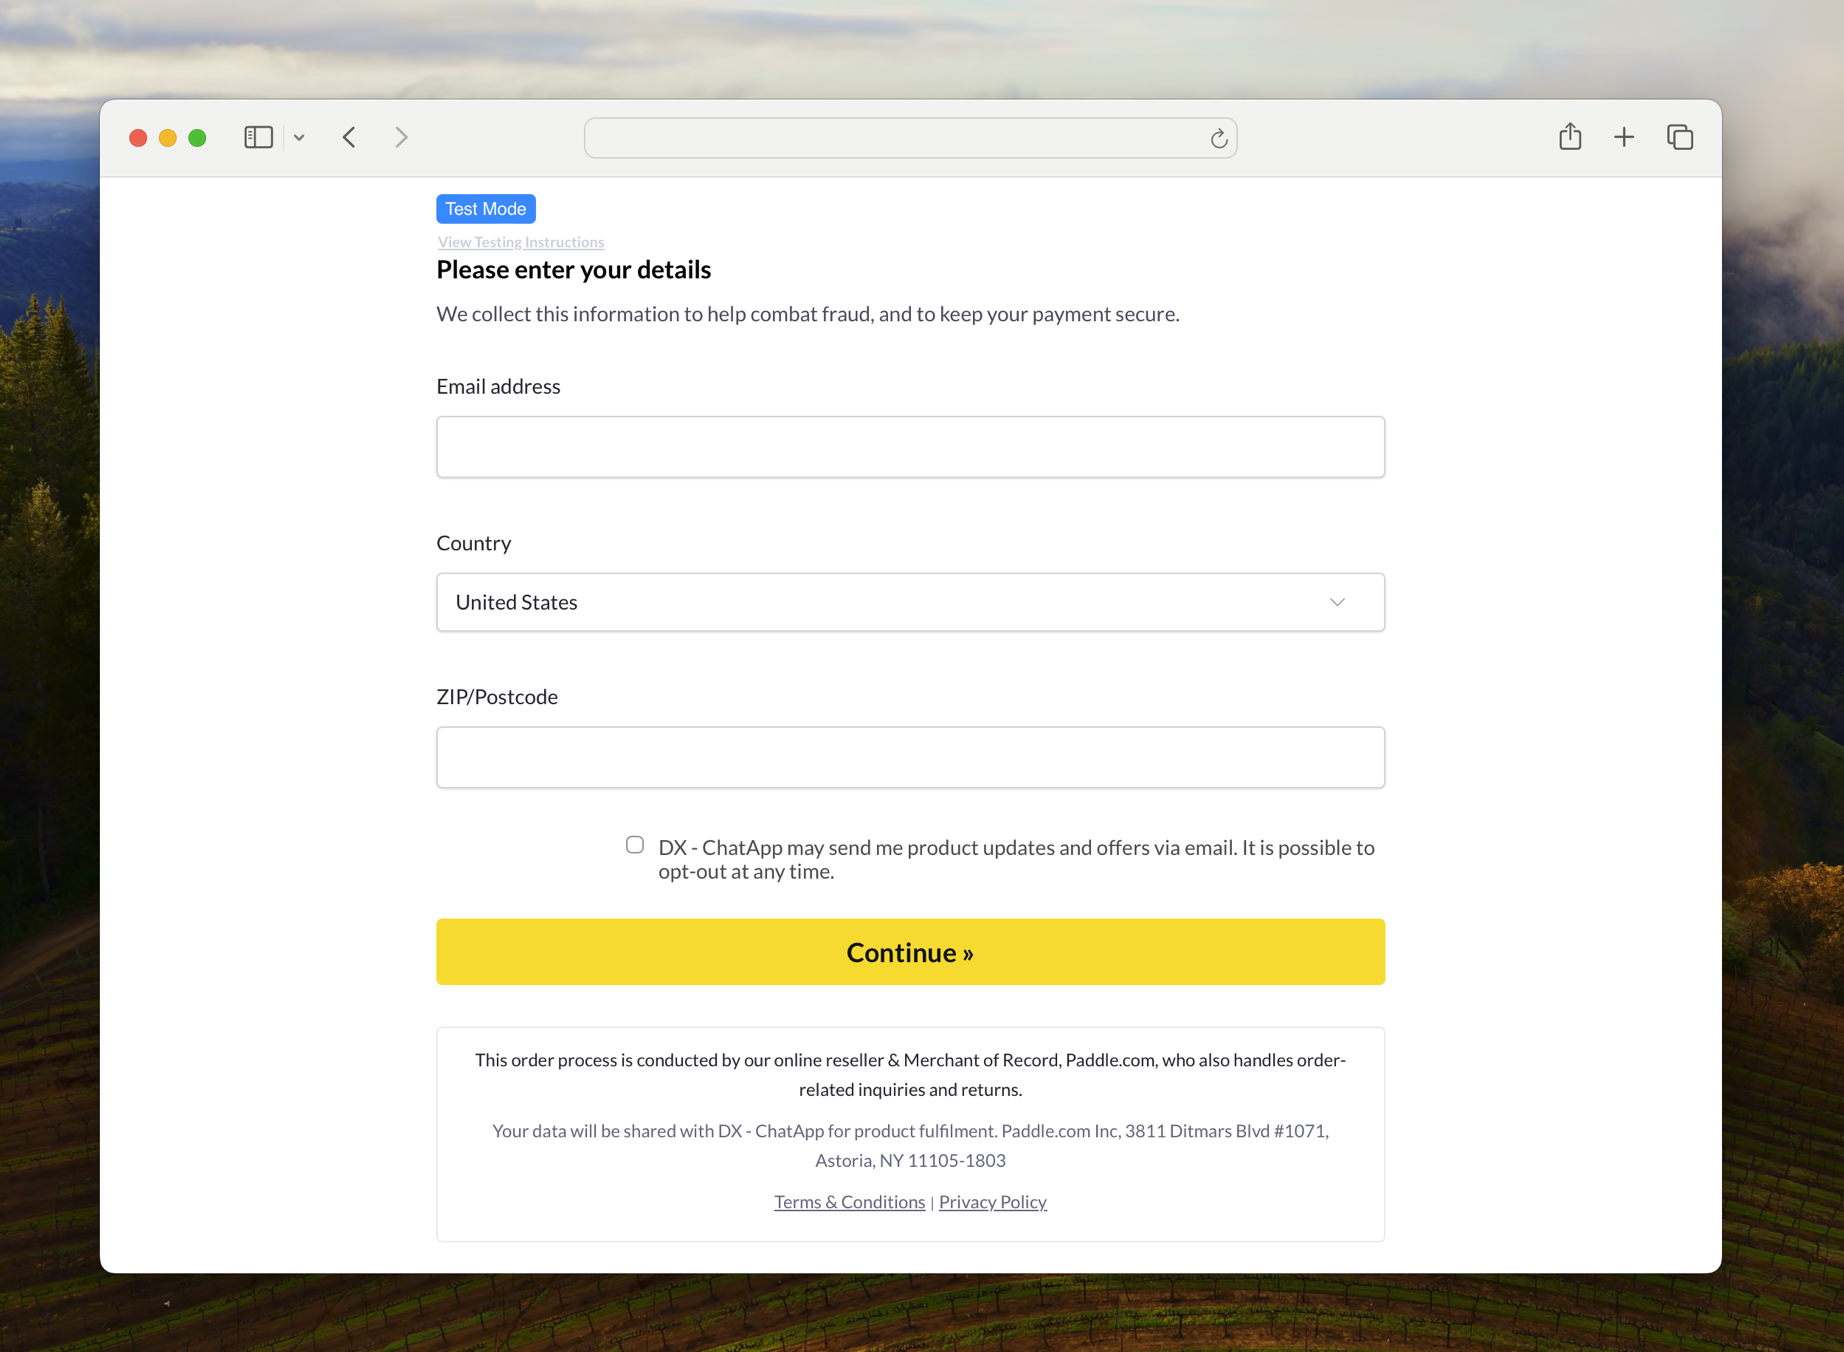
Save your page, then open it in your browser. Paddle Checkout should load in place of the checkout container <div> element we created earlier.
You'll notice that the Paddle Checkout frame doesn't include any information about what the checkout is for. That's our next step.
Show and update on-page information
The inline checkout frame doesn't include a breakdown of items or totals. It's designed to handle capturing customer and payment information, giving you the flexibility to show items and totals in your frontend in a way that fits with our design.
To do this, we can use an event callback function. Paddle.js emits events throughout the checkout process when key things happen. An event callback function is some code that we run when a specific event occurs.
For example, when checkout is first loaded, Paddle.js emits a checkout.loaded event that contains information about the items and totals on a checkout. We can build an event callback function to update our items and totals table with data contained in the event.
It's important that customers know who they're buying from, what they're buying, and how much they're paying.
To build an inline checkout that's compliant and optimized for conversion, your implementation must include:
- If recurring, how often it recurs and the total to pay on renewal. If a trial, how long the trial lasts.
- A description of what's being purchased.
- Transaction totals, including subtotal, total tax, and grand total. Be sure to include the currency too.
- The full inline checkout frame, including the checkout footer that has information about Paddle, our terms of sale, and our privacy policy.
- A link to your refund policy, if it differs from the Paddle.com standard refund policy.
Add tables to hold items and totals
First, we need to add some HTML for a couple of tables to hold items and totals information. You might use something more visual when building an app or website, but tables work for our tutorial.
Add this to the <body> of your page.
In this sample, there are two tables for our items and our totals:
- Our items table has a header row and a body row that's got some zero values in. We'll add a row for each item on our checkout later.
- Our totals table has a header column for the totals we'd like to show to our customer. There's
ids set on the<td>elements that should contain totals. We'll use these IDs to replace the contents of these elements with totals later.
<div class="page-container"> <div class="grid"> <div class="checkout-container"> </div> <div> <h3>Items</h3> <table class="items-table"> <thead> <tr> <th>Product name</th> <th>Price name</th> <th>Quantity</th> <th>Total</th> </tr> </thead> <tbody> <tr> <td></td> <td></td> <td>0</td> <td>00.00</td> </tr> </tbody> </table> <h3>Totals</h3> <table> <tbody> <tr> <td>One-time charges</td> <td id="oneTimeTotal">0.00</td> </tr> <tr> <td>Recurring charges</td> <td id="recurringTotal">0.00</td> </tr> <tr> <td>Discount</td> <td id="discountTotal">0.00</td> </tr> <tr> <td>Taxes</td> <td id="taxTotal">0.00</td> </tr> <tr> <td>Total today</td> <td id="totalToday">0.00</td> </tr> </tbody> </table> </div> </div></div>Add this to the <head> of your page. It applies some styling to the HTML so that the <div> elements are arranged in two columns.
For this sample, we also include MVP.css, which applies light styling to HTML elements. You don't need to do this if you're updating an existing page in your app or website that already has its own styling.
<style> .page-container { max-width: 1000px; margin: 0 auto 2em auto; padding-left: 1em; padding-right: 1em; } .grid { display: block; } .grid > * { padding: 1rem; } @media (min-width: 768px) { .grid { display: grid; grid-auto-rows: 1fr; grid-template-columns: 1fr 1fr; } } .items-table { font-size: smaller; }</style><!-- MVP.css: https://andybrewer.github.io/mvp/ --><link rel="stylesheet" href="https://unpkg.com/mvp.css@1.12.0/mvp.css" media="print" onload="this.media='all'">Update items table
Next, we'll build an event callback function to take data about our items from events and display it in our items table.
In our sample, we created a function called updateTable() that takes a parameter called event. Then, we pass the event payload to our function as event. Here's how it works:
- First, we exclude events that don't return a
namefield and print the data payload of events to the console. This is useful for us to see which events are emitted and how they look while we're testing. - We create a variable called
itemsand set this toevent.data.itemsin our event payload. We'll use this variable to populate our items table. - We call another function as part of this event callback function:
updateItemsTable(), where we passitemsas a parameter. - We create the
updateItemsTable()function that we called in our event callback, setting it up to accept a parameter calleditems. It finds and selects our items table body (.items-table tbody), clears out any rows, then iterates through each item in theitemsarray we passed. - When iterating through each item, we call another function called
createTableRow(). We define this underneath, and it acceptsproductName,priceName,quantity, andtotal— a parameter for each of the columns in our items table. createTableRow()returns an HTML table row element with our product name, price name, quantity, and total. This newly created row is appended to our table body in ourupdateItemsTable()function.- We update our
Paddle.Initialize()method, passingupdateTableas theeventCallback. This means this function is run every time an event is emitted by Paddle.js.
<script type="text/javascript">  function updateTable(event) {    if (!event.name) {      return;    }
    console.log(event);
    let items = event.data.items;
    updateItemsTable(items);  }
  function updateItemsTable(items) {    const itemsTableBody = document.querySelector('.items-table tbody');    itemsTableBody.innerHTML = '';
    items.forEach(item => {      const newRow = createTableRow(item.product.name, item.price_name, item.quantity, item.totals.subtotal);      itemsTableBody.appendChild(newRow);    });  }
  function createTableRow(productName, priceName, quantity, total) {      const newRow = document.createElement('tr');      newRow.innerHTML = `      <td>${productName}</td>      <td>${priceName}</td>      <td>${quantity}</td>      <td>${total.toFixed(2)}</td>    `;      return newRow;  }
  Paddle.Environment.set("sandbox");  Paddle.Initialize({    token: "test_7d279f61a3499fed520f7cd8c08", // replace with a client-side token    checkout: {      settings: {        displayMode: "inline",        frameTarget: "checkout-container",        frameInitialHeight: "450",        frameStyle: "width: 100%; min-width: 312px; background-color: transparent; border: none;"      }    },    eventCallback: updateTable  });
  // define items  let monthItemsList = [    {      priceId: 'pri_01gsz8x8sawmvhz1pv30nge1ke',      quantity: 10    },    {      priceId: 'pri_01gsz95g2zrkagg294kpstx54r',      quantity: 1    },    {      priceId: 'pri_01gsz98e27ak2tyhexptwc58yk',      quantity: 1    }  ];
// open checkout function openCheckout(items){ Paddle.Checkout.open({ items: items }); }</script>Update totals table
Let's update our event callback function so that it displays totals from our events in our totals table.
In our sample, we updated our updateTable() function so that it calls another function, updateSummaryTable(), to update our totals table. Here's how it works:
- We create some additional variables called
totalsandrecurringTotals, setting these to values in our event payload. - We add a call to another function as part of this event callback function:
updateSummaryTable(), where we passtotalsandrecurringTotalsas parameters. - We create the
updateSummaryTable()function that we called in our event callback, setting it up to accept parameters calledtotalsandrecurringTotals. updateSummaryTable()gets cells in our totals table using the IDs that we gave them earlier, then replaces the contents with values from thetotalsandrecurringTotalsarrays that we passed in as parameters. We calculate the one-time total by subtracting the subtotal of recurring items from the subtotal.
For simplicity, we use the built-in .toFixed() JavaScript method to format values to two decimal places in our sample. Paddle supports over 30 currencies, some of which use a different number of decimal places. Consider using a currency library like currency.js to format currencies correctly.
<script type="text/javascript">  function updateTable(event) {    if (!event.name) {      return;    }
    console.log(event);
    let items = event.data.items;    let totals = event.data.totals;    let recurringTotals = event.data.recurring_totals;
    updateItemsTable(items);    updateSummaryTable(totals, recurringTotals);  }
  function updateItemsTable(items) {    const itemsTableBody = document.querySelector('.items-table tbody');    itemsTableBody.innerHTML = '';
    items.forEach(item => {      const newRow = createTableRow(item.product.name, item.price_name, item.quantity, item.totals.subtotal);      itemsTableBody.appendChild(newRow);    });  }
  function createTableRow(productName, priceName, quantity, total) {    const newRow = document.createElement('tr');    newRow.innerHTML = `      <td>${productName}</td>      <td>${priceName}</td>      <td>${quantity}</td>      <td>${total.toFixed(2)}</td>    `;    return newRow;  }
  function updateSummaryTable(totals, recurringTotals) {    document.getElementById('oneTimeTotal').textContent = (totals.subtotal - recurringTotals.subtotal).toFixed(2);    document.getElementById('recurringTotal').textContent = recurringTotals.subtotal.toFixed(2);    document.getElementById('discountTotal').textContent = totals.discount.toFixed(2);    document.getElementById('taxTotal').textContent = totals.tax.toFixed(2);    document.getElementById('totalToday').textContent = totals.total.toFixed(2);  }
  Paddle.Environment.set("sandbox");  Paddle.Initialize({    token: "test_7d279f61a3499fed520f7cd8c08", // replace with a client-side token    checkout: {      settings: {        displayMode: "inline",        frameTarget: "checkout-container",        frameInitialHeight: "450",        frameStyle: "width: 100%; min-width: 312px; background-color: transparent; border: none;"      }    },    eventCallback: updateTable  });
  // define items  let monthItemsList = [    {      priceId: 'pri_01gsz8x8sawmvhz1pv30nge1ke',      quantity: 10    },    {      priceId: 'pri_01gsz95g2zrkagg294kpstx54r',      quantity: 1    },    {      priceId: 'pri_01gsz98e27ak2tyhexptwc58yk',      quantity: 1    }  ];
// open checkout function openCheckout(items){ Paddle.Checkout.open({ items: items }); }</script>Take a test payment
We're now ready to test. Save your page, then open it in your browser. Paddle.js should open an inline checkout for the items that we passed. You should see items and totals in the tables we created.
If you're using a sandbox account, you can take a test payment using our test card details:
- Email address
-
An email address you own
- Country
-
Any valid country supported by Paddle
- ZIP code (if required)
-
Any valid ZIP or postal code
- Card number
-
4242 4242 4242 4242 - Name on card
-
Any name
- Expiration date
-
Any valid date in the future.
- Security code
-
100
If the checkout doesn't appear, or you get a message saying "Something went wrong," you can open your browser console to see any specific error messages from Paddle.js to help you troubleshoot.
Use ⌘ Command + ⌥ Option + J (Mac) or Ctrl + ⇧ Shift + J (Windows) to quickly open your browser console in Google Chrome.
Common problems
Check that:
- You added a default payment link to your checkout under Paddle > Checkout > Checkout settings > Default payment link, and that this matches the domain where you're testing. You can use
localhostif you're testing locally on sandbox. - You included Paddle.js correctly. If you're moving from Paddle Classic, the CDN URL has changed.
- Your client-side token is correct and passed to
Paddle.Initialize(). - You set the correct environment.
- The Paddle IDs for price entities that you passed are correct. Sandbox and live systems are separate, so make sure you're passing price IDs for the environment that you're working in.
- Your event callback function doesn't have any problems.
Update items on the checkout Optional
What if we want to update our checkout now it's opened? For example, we might want to let customers adjust the quantity of items or upsell them addons. Paddle.js includes the Paddle.Checkout.updateCheckout() method to let us dynamically update items, customer information, and discount on a checkout.
For this tutorial, we'll add a button that we can click to switch to annual plan. When customers click this button, we'll swap monthly items on the checkout for annual plan items.
Define list of prices
Paddle.Checkout.updateCheckout() has an items parameter. When we pass an items list, Paddle.js replaces the items on the checkout with the new items list we passed.
First, we'll define a new variable called yearItemsList. Like monthItemsList, we'll pass an array of objects, where each object contains a priceId and quantity. In this case, there are two prices that recur yearly and a single one-time price.
Keep in mind that the entire items list is replaced — any omitted items are removed from the checkout entirely.
Recurring items on a checkout must have the same billing interval. For example, you can't have a checkout with some prices that are billed monthly and some products that are billed annually.
<script type="text/javascript">  function updateTable(event) {    if (!event.name) {      return;    }
    console.log(event);
    let items = event.data.items;    let totals = event.data.totals;    let recurringTotals = event.data.recurring_totals;
    updateItemsTable(items);    updateSummaryTable(totals, recurringTotals);  }
  function updateItemsTable(items) {    const itemsTableBody = document.querySelector('.items-table tbody');    itemsTableBody.innerHTML = '';
    items.forEach(item => {      const newRow = createTableRow(item.product.name, item.price_name, item.quantity, item.totals.subtotal);      itemsTableBody.appendChild(newRow);    });  }
  function createTableRow(productName, priceName, quantity, total) {    const newRow = document.createElement('tr');    newRow.innerHTML = `      <td>${productName}</td>      <td>${priceName}</td>      <td>${quantity}</td>      <td>${total.toFixed(2)}</td>    `;    return newRow;  }
  function updateSummaryTable(totals, recurringTotals) {    document.getElementById('oneTimeTotal').textContent = (totals.subtotal - recurringTotals.subtotal).toFixed(2);    document.getElementById('recurringTotal').textContent = recurringTotals.subtotal.toFixed(2);    document.getElementById('discountTotal').textContent = totals.discount.toFixed(2);    document.getElementById('taxTotal').textContent = totals.tax.toFixed(2);    document.getElementById('totalToday').textContent = totals.total.toFixed(2);  }
  Paddle.Environment.set("sandbox");  Paddle.Initialize({    token: "test_7d279f61a3499fed520f7cd8c08", // replace with a client-side token    checkout: {      settings: {        displayMode: "inline",        frameTarget: "checkout-container",        frameInitialHeight: "450",        frameStyle: "width: 100%; min-width: 312px; background-color: transparent; border: none;"      }    },    eventCallback: updateTable  });
  // define items  let monthItemsList = [    {      priceId: 'pri_01gsz8x8sawmvhz1pv30nge1ke',      quantity: 10    },    {      priceId: 'pri_01gsz95g2zrkagg294kpstx54r',      quantity: 1    },    {      priceId: 'pri_01gsz98e27ak2tyhexptwc58yk',      quantity: 1    }  ];  let yearItemsList = [    {      priceId: 'pri_01gsz8z1q1n00f12qt82y31smh',      quantity: 10    },    {      priceId: 'pri_01gsz96z29d88jrmsf2ztbfgjg',      quantity: 1    },    {      priceId: 'pri_01gsz98e27ak2tyhexptwc58yk',      quantity: 1    }  ];
// open checkout function openCheckout(items){ Paddle.Checkout.open({ items: items }); }</script>Update items
Next, we'll build a function to replace items on our checkout
In our sample, we created a function called switchPlan(). Here's how it works:
- We create a variable called
isMonthlyand set it totrue. This variable tracks whether the current plan is monthly or yearly, and it's set totrueinitially because we passmonthItemsListto our checkout when the page loads. - We create a function called
switchPlan(), then set a variable calledupdatedItemsto ouryearItemListarray ifisMonthlyistrue, andmonthItemListifisMonthlyisfalse. - We call the
Paddle.Checkout.updateCheckout()method, passingupdatedItemsas theitemsparameter. This is our yearly items list when the plan is monthly, and our monthly items list when the plan is yearly. - We toggle the value of
isMonthly. If it weretrue, it's set tofalse; if it werefalse, it's set totrue. This means that next timeswitchPlan()is called, it'll switch plans correctly.
<script type="text/javascript">  function updateTable(event) {    if (!event.name) {      return;    }
    console.log(event);
    let items = event.data.items;    let totals = event.data.totals;    let recurringTotals = event.data.recurring_totals;
    updateItemsTable(items);    updateSummaryTable(totals, recurringTotals);  }
  function updateItemsTable(items) {    const itemsTableBody = document.querySelector('.items-table tbody');    itemsTableBody.innerHTML = '';
    items.forEach(item => {      const newRow = createTableRow(item.product.name, item.price_name, item.quantity, item.totals.subtotal);      itemsTableBody.appendChild(newRow);    });  }
  function createTableRow(productName, priceName, quantity, total) {    const newRow = document.createElement('tr');    newRow.innerHTML = `      <td>${productName}</td>      <td>${priceName}</td>      <td>${quantity}</td>      <td>${total.toFixed(2)}</td>    `;    return newRow;  }
  function updateSummaryTable(totals, recurringTotals) {    document.getElementById('oneTimeTotal').textContent = (totals.subtotal - recurringTotals.subtotal).toFixed(2);    document.getElementById('recurringTotal').textContent = recurringTotals.subtotal.toFixed(2);    document.getElementById('discountTotal').textContent = totals.discount.toFixed(2);    document.getElementById('taxTotal').textContent = totals.tax.toFixed(2);    document.getElementById('totalToday').textContent = totals.total.toFixed(2);  }
  Paddle.Environment.set("sandbox");  Paddle.Initialize({    token: "test_7d279f61a3499fed520f7cd8c08", // replace with a client-side token    checkout: {      settings: {        displayMode: "inline",        frameTarget: "checkout-container",        frameInitialHeight: "450",        frameStyle: "width: 100%; min-width: 312px; background-color: transparent; border: none;"      }    },    eventCallback: updateTable  });
  // define items  let monthItemsList = [    {      priceId: 'pri_01gsz8x8sawmvhz1pv30nge1ke',      quantity: 10    },    {      priceId: 'pri_01gsz95g2zrkagg294kpstx54r',      quantity: 1    },    {      priceId: 'pri_01gsz98e27ak2tyhexptwc58yk',      quantity: 1    }  ];  let yearItemsList = [    {      priceId: 'pri_01gsz8z1q1n00f12qt82y31smh',      quantity: 10    },    {      priceId: 'pri_01gsz96z29d88jrmsf2ztbfgjg',      quantity: 1    },    {      priceId: 'pri_01gsz98e27ak2tyhexptwc58yk',      quantity: 1    }  ];
  // open checkout  function openCheckout(items){    Paddle.Checkout.open({      items: items    });  }
  // switch plan  let isMonthly = true;
function switchPlan() { let updatedItems = isMonthly ? yearItemsList : monthItemsList; Paddle.Checkout.updateCheckout({ items: updatedItems }); isMonthly = !isMonthly; }</script>Add a button to swap plan
Finally, add a button to our HTML to call our switchPlan() function.
<a href="#" onclick="switchPlan()"><b>Switch plan</b></a>Test your work
Save your page, then open it in your browser. Paddle Checkout should load as before. When you click the switch plan button, Paddle.js swaps items on your checkout from monthly to annual, and vice versa.
Next steps
That's it. Now you've built a checkout, you might like to extend Paddle Checkout by presenting other fields to your checkout, automatically applying a discount, passing optional checkout settings, or building a success workflow.
Add other fields to your checkout
Events emitted by Paddle.js contain information about the items and totals on a checkout. We present fields in data.items[], data.product, data.totals, and data.recurring_totals in our sample.
You might like to include other data from the event on your page.
Automatically apply a discount
Extend your checkout by passing a discount. When our checkout is launched, Paddle automatically applies the discount (where it's valid).
Learn how to pass customer or business info (like email, name, or address) to Paddle Checkout.
Set up and manage discount codes or time-limited promotions for your products.
Pass checkout settings
We covered passing the required settings for inline checkout, but there are a bunch of other settings you can pass that give you more control over how opened checkouts work. For example, you can set the language that Paddle Checkout uses, hide the option to add a discount, or restrict payment methods shown to customers.
See all the settings you can pass to configure your inline checkout.
Full API documentation for opening and customizing checkouts.
Build a success workflow
When customers complete checkout, Paddle Checkout has a final screen that lets customers know that their purchase was successful. If you like, you can redirect customers to your own page or use JavaScript event callbacks to build a more advanced success workflow.